Set maximum amount of memory usable by windows: Are you having a issue with the amount of memory your computer see and use? got yourself 6GB or 12Gb of Ram and the computer is only using 2.99GB? or maybe you have a similar scenario when computer is only seeing a small amount of your memory.
Lets cover some basics first:
1. If you running 32-bit operating systems, the limit is 4GB of RAM.
2. If you running 64-bit operating systems, the limit is 128GB of RAM.
3. Integrated/Onboard Graphics Chip. Part of your memory (RAM) will be allocated for this.
However, if the above does not apply and your Windows 7 64-bit or Windows 8 64-bit computer is not seeing or having trouble recognizing all of the physical RAM in your computer, then all is not lost. I will show you a fix that might solve your issue, just follow my guide below.
Fix the maximum amount of RAM (Memory) Windows 7 64-bit or Windows 8 64-bit can use.
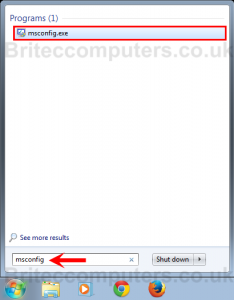
1. Press the Windows + R keys to open the Run box, type msconfig, and press Enter or click msconfig.
2. Click Yes to UAC (User Account Control)
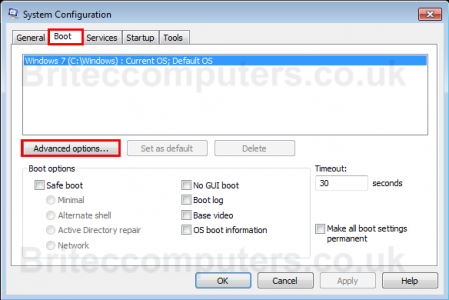
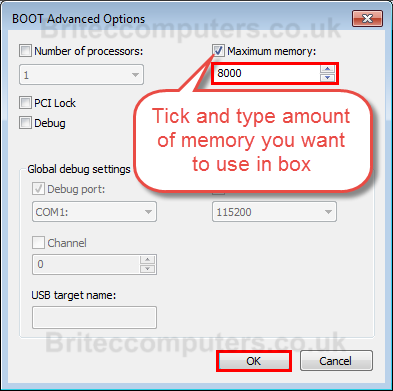
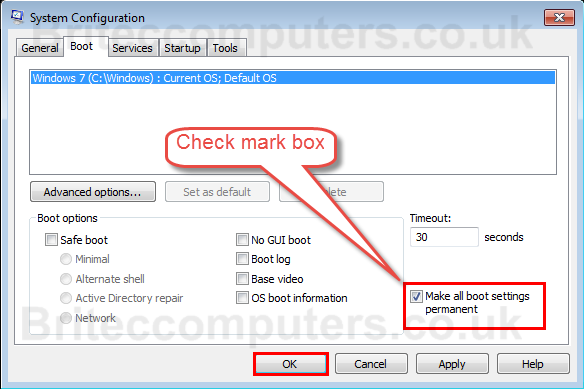
3. Click Boot tab in System Configuration, click Advanced options button
4. To use all installed memory on your system (This is the default setting.)
- Uncheck the Maximum memory box, and click OK

5. To use a specified amount of memory
- Check the Maximum memory box and type the amount of memory you want windows to use.
6. Check the Make all boot settings permanent box, and click OK.
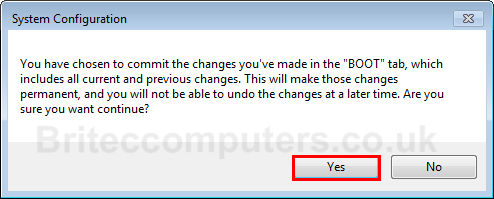
7. Click Yes.
NOTE: You can always make changes or set back to default.
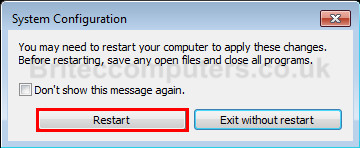
8. Click Restart button. (Remember to save work, because system will restart immediately)
That’s it, you should now see full amount of Ram (memory) in your computer.
If this helps, please share with your friends.
More info by Mark Russinovich can be found here Pushing the Limits of Windows: Physical Memory